How to use fonts
Fonts are sets of lettering styles that you can install on your computer. When installed, you can use them for any file or piece of artwork that you create on your machine.
However, opening those files on another computer can sometimes prove problematic. Problems may surface with regards to the appearance of the text, because the font is not yet installed on the computer in question. As a result, the computer does not have the required information to display and edit those texts correctly.
To avoid these issues, it is important that you convert the fonts in your artwork to curves. In this tutorial we will show you how to do so.
Saving graphic production files as PDF / X1A eliminates the need for manual conversion to curves.
How to change fonts to curves
Careful: Before continuing, make sure you save the original document under another name first, since at the end of this process you won’t be able to edit text anymore.
First, you need to identify the fonts that you want to convert into curves, and find their location in the artwork. The “Find Font” tool will allow you to do exactly this.
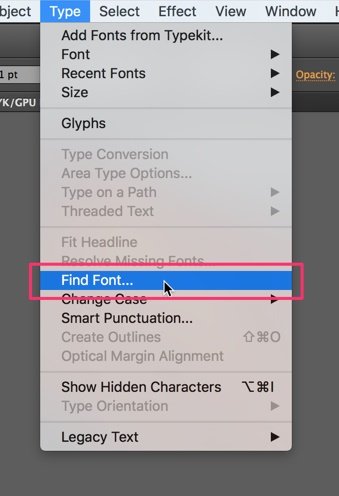
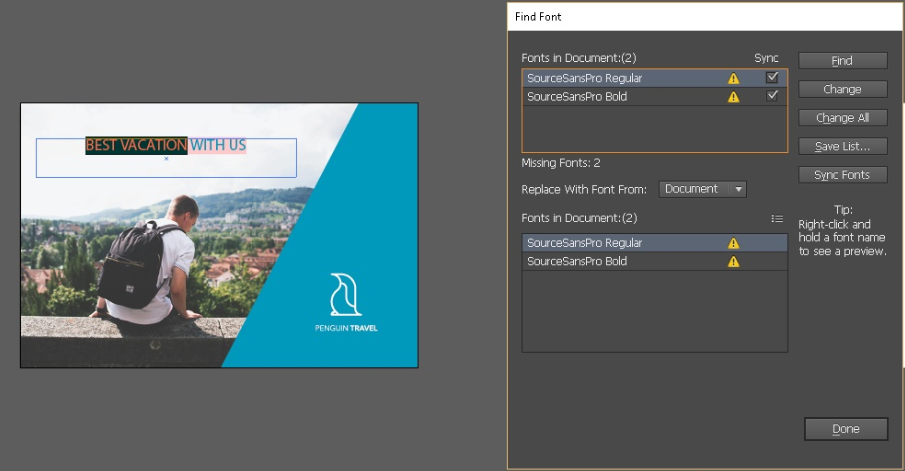
In the Top Menu, click Type → Find Font. The window that opens, will list all the different fonts in your document.

To locate the fonts in the artwork, select the listed elements one by one and click “Find” for each of them to highlight them in the artwork.

Once you know where the fonts are located, select them individually. To convert the selected font to curves, go the the Top Menu and click Type → Create Outlines.

This process converts your font to curves, preventing any changes in appearance when switching computers. With just a couple of clicks, you convert all fonts in your document for perfect compatibility.
Please keep in mind, that converting your fonts to curves will prevent you from further editing the text.


