We won’t emphasize this enough: Preparing your artwork file before sending to your printing company is crucial for the quality of the printing! To make sure that you will receive high quality final products, all aspects of your artwork needs to be closed perfectly. In this article, we will talk about bleed and margins, one of the crucial aspects of artwork closing. For an overview and tutorials on all the artwork closing steps, please refer to our How to close artwork section
While we already discussed the setup of bleed and margin on our blog, in this post we will focus more on explaining what happens when you don’t set it up properly.
First, here’s a refresher on why bleed and margins are so important. Basically, digital and offset printing machines, which are very mechanical, never print accurately to the millimeter. Due to [small] variations in the position of the paper, as well as the position of the mechanical elements of the machine, you can always expect some small differences across the printed sheets.
Taken alone, this is not really an issue. But large printed sheets need to be cut into individual products, and this is where problems can occur. Without bleed and margins, some important information can be cut out, or your products can end up with a white border around the artwork. That is exactly why bleed adds a safety buffer to ensure that you won’t have a white edge around your artwork after cutting, and safety margins ensure that no important content will be cut off.
Let’s have a look at a couple of examples of what can go wrong if bleed is not set up properly.
Problems Caused By Wrong Bleed and Margin Settings:
Below we will discuss some real-life examples of customers whose artwork file had faulty bleed and margin settings at the time the file was sent to the factory. Even though Gogoprint has an artwork team who will check and correct your artwork files before sending them to the factory, it’s always best to correctly add the bleed and margin on your side, to make sure we avoid all errors. Indeed, if you don’t add bleed, it can become complicated for Gogoprint’s artwork team to fix it, and a trained eye might notice the fixes.
Obvious reflections:

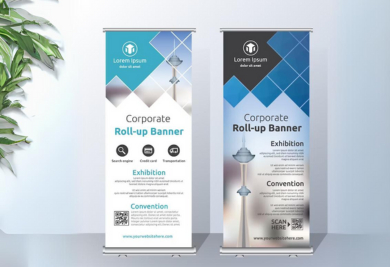
Most of the time when there is no bleed, our team will add 3mm to the edge of your artwork by taking the reflection of the 3mm before the edge. By doing this, we can make sure that there is no white border around your artwork after cutting. However, it is a fix and therefore does not always look perfect. In some cases it will even be quite obvious. The first two pictures above illustrate what could happen to your final products if you forget about bleed, and our artwork team needs to add it by reflecting the borders. The key takeaway here is: Avoid these issues by adding 3mm of bleed!
White borders around your artwork:

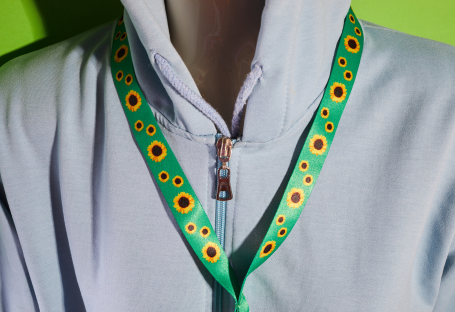
When there is no bleed in your artwork file, and no fix can be applied, your products will end up with a white border around the edge of your artwork, as can be seen in the image above.
So how do we avoid these issues?
1. Always add 3mm of bleed on all sides of your artwork, to ensure that there is no white area surrounding your printed artwork after cutting
2. Always set safety margins of 3mm on all sides and keep all important information within those margins to ensure that no part of your artwork can get cut off
And how do we set up bleed and margins?
Setting up bleed and margins is not difficult, it is simply a question of systematically remembering it.
Set up Bleed and Margin in Adobe Illustrator in 3 steps:
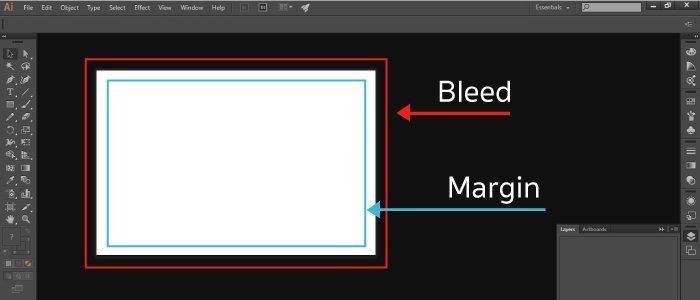
1. Create your artboard in the final format that you would like to have your products printed. For example, for 9x5.5cm business cards, set the dimensions of the artboard to 90mm. X 55mm. Make sure to set 3mm of bleed on all sides of the artboard during set up. You can also add bleed later on by clicking File > Document Setup. Once bleed is set, you should see a red border around your artwork.
2. To add safety margins, select the rectangle tool, create a rectangle that is the same dimensions as your artwork file minus 3mm on each side. In our example that would be a rectangle of 8.4x4.9cm. Make sure to place the rectangle on your artboard, and align it horizontally and vertically with the center of your business card (see image below). Once that is done, right click the rectangle, and click Make Guides.

3. When you add images or graphic shapes to your design, make sure to place their border against the red bleed line, and then resize them. This will avoid any risk of cutting out important elements. When adding text and other important information, make sure to keep inside the blue safety margin.
It’s as simple as that. If you want perfect prints, and in-time production, make sure to follow our bleed instructions. Proper bleed settings are really one of the most important settings for perfect printing.
Related Articles:
How to close artwork in Illustrator
Video Tutorial: Creating Professional & Print-Ready Business Cards - Adobe Illustrator+ FREE TEMPLATE
Video Tutorial: Creating Professional & Print-Ready Business Cards - Microsoft Word+ FREE TEMPLATE


