Generating a PDF / X-1a file
Before saving your artwork as a PDF as described in this tutorial, please make sure that the security margins and bleed are set compliant with our requirements. To ensure a perfect result, please set a bleed of 3mm, and a safety margin of 3mm as well.
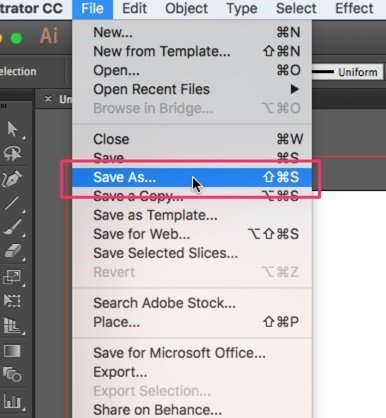
Once you made sure that your file is ready for printing, click File → Save As in the Top Menu.

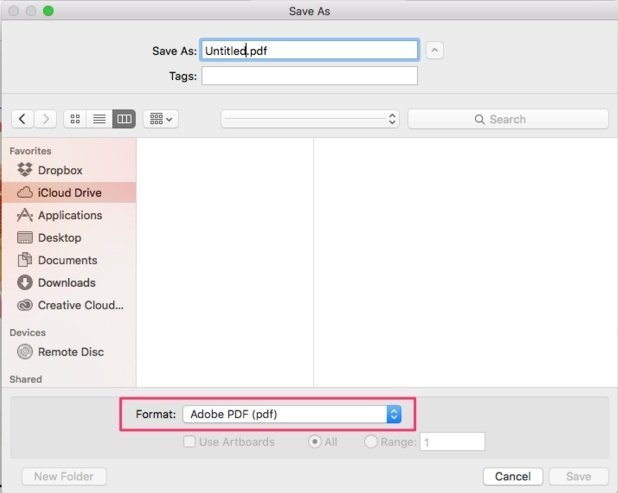
Under Format, choose Adobe PDF (pdf), and then click “Save”. This will open a window for PDF specifications.

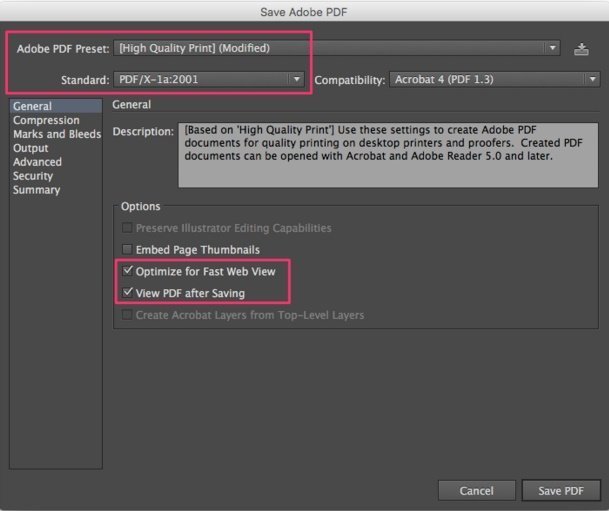
In this window, set the Adobe PDF Preset field to the [High Quality Print] option. In some Adobe Illustrator versions, this menu might only show a “Custom” option. In any case, set Standard to PDF/X-1a:2001, and tick the Optimize for Fast Web View, and View PDF after Saving options in the Options panel.

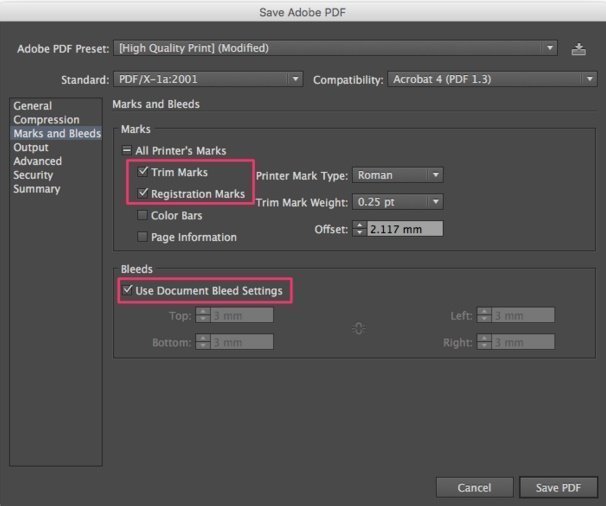
Next, select “Marks and Bleeds” on the left side, and tick the boxes for “Trim Marks” and “Registration Marks” in the Marks panel, to ensure that the printed product is properly cut. In the Bleeds panel, tick the “Use Document Bleed Settings” option.

After ensuring once again that all settings have been selected as described above, click Save PDF.


