Bleed and margins are one of the most important settings to ensure that your final artwork files are printed in the highest quality possible. Indeed, a couple of important issues can arise because of the cutting process if you don’t properly set up bleed and respect safety margins.
1. Without sufficient bleed, your final products may end up having a white edge around the artwork
2. If you place text and other important content outside of the safe zone, parts of that content risk being cut off
Photoshop is not an ideal software for setting up artwork files for printing, and one of the reasons for this is the setup of bleeds and margins. Since there is no standard option to create the bleeds automatically, such as in Illustrator, you must always add the size of the bleeds to the size of your canvas.
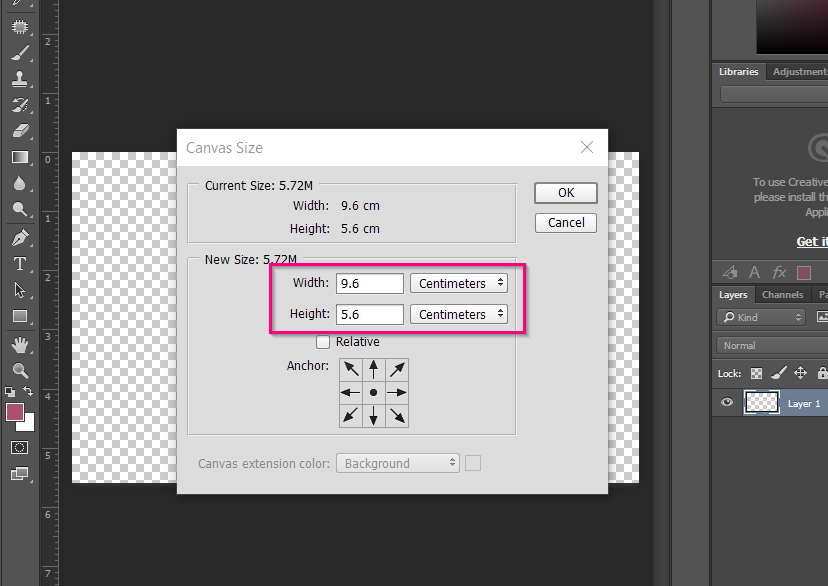
For example, if you are preparing the design of a business card in the final format 9x5cm, your canvas in Photoshop should be set to 9.6x5.6cm, to account for the bleed of 0.3cm that needs to be added to each side.
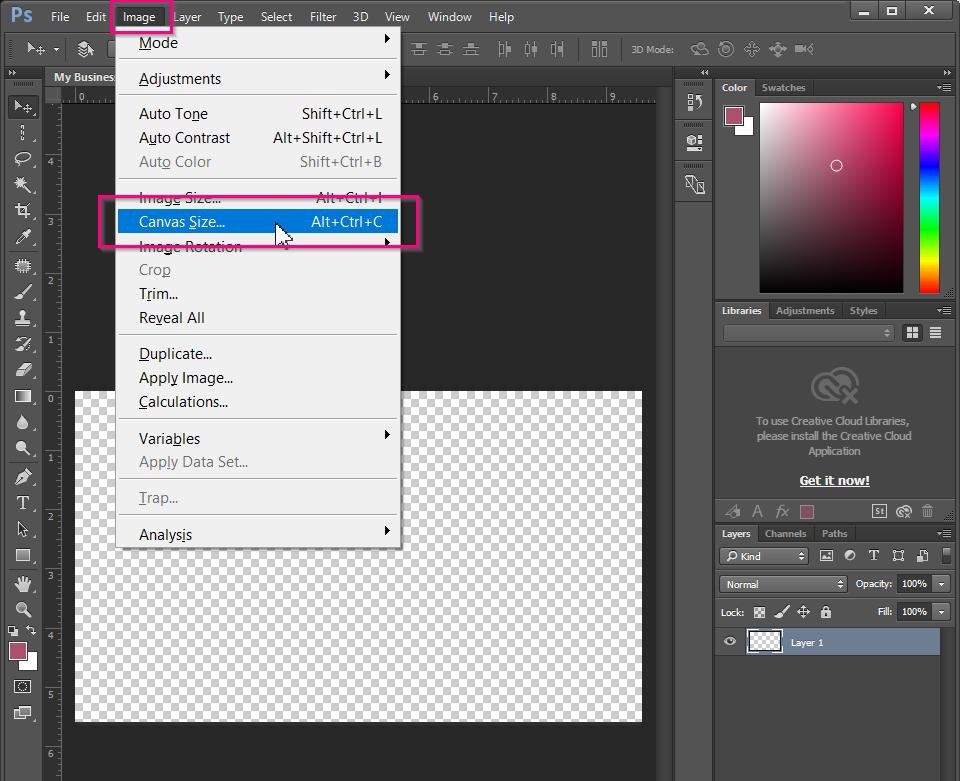
You can always check the dimension of your canvas by clicking Image > Canvas Size, as shown below.
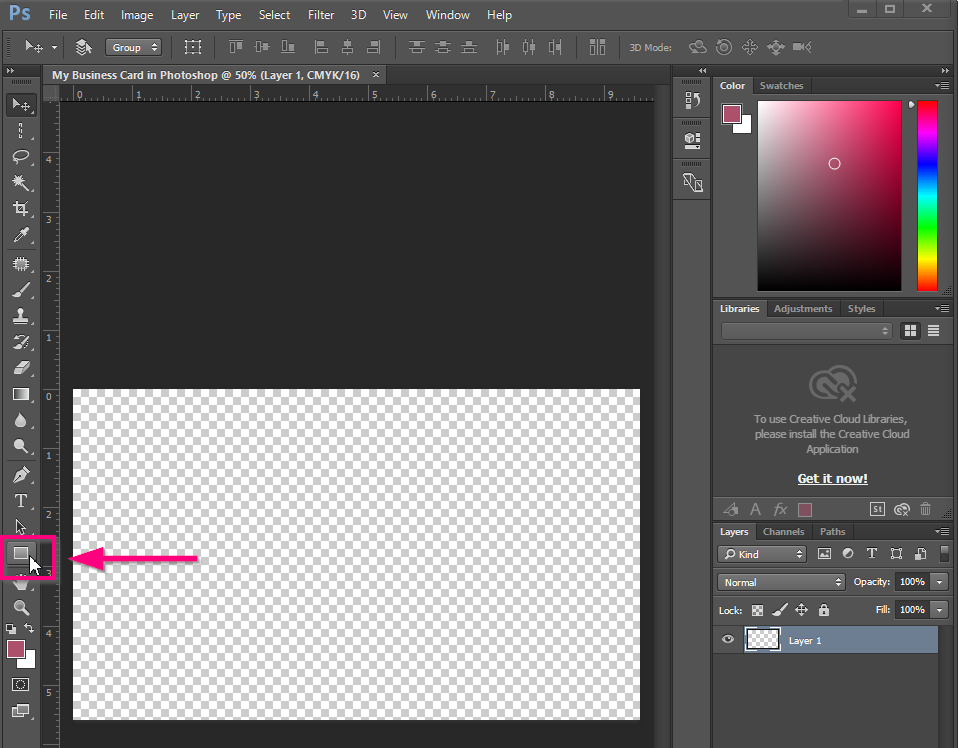
Now that your canvas size is correct, you still need to mark off the bleed area, and add safety margins. First, use the Rectangle Tool to create a rectangle that is the dimension of your final product. In the case of our business card, that is 9x5cm.
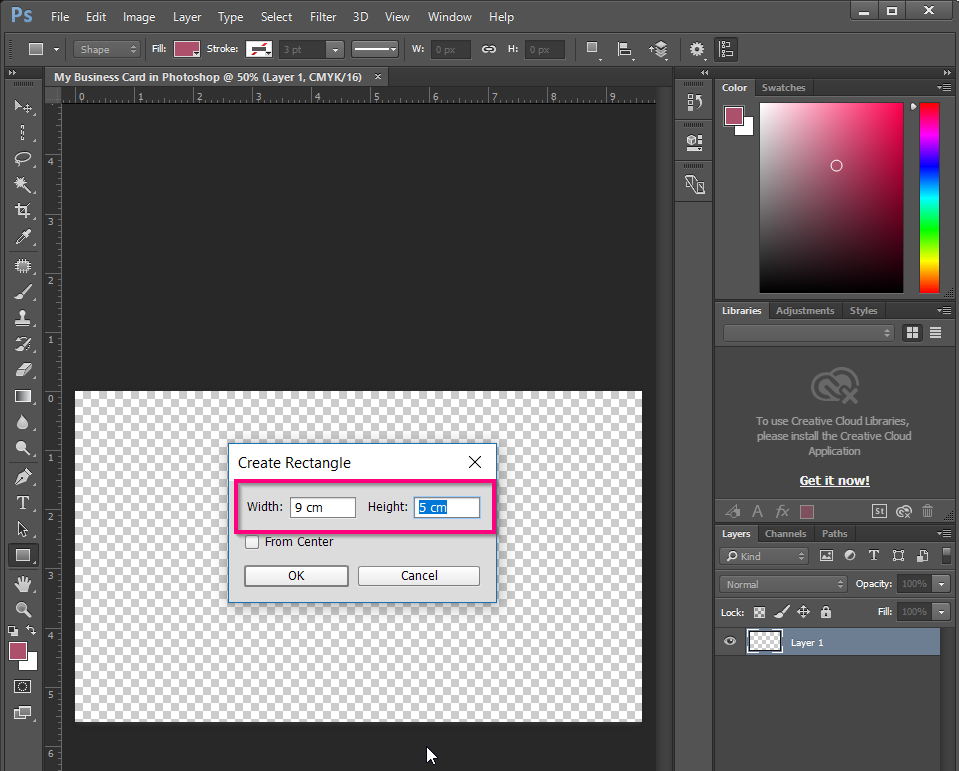
To create the rectangle, click anywhere in your canvas and set the dimensions to 9cm width and 5cm height (you can simply type it in).
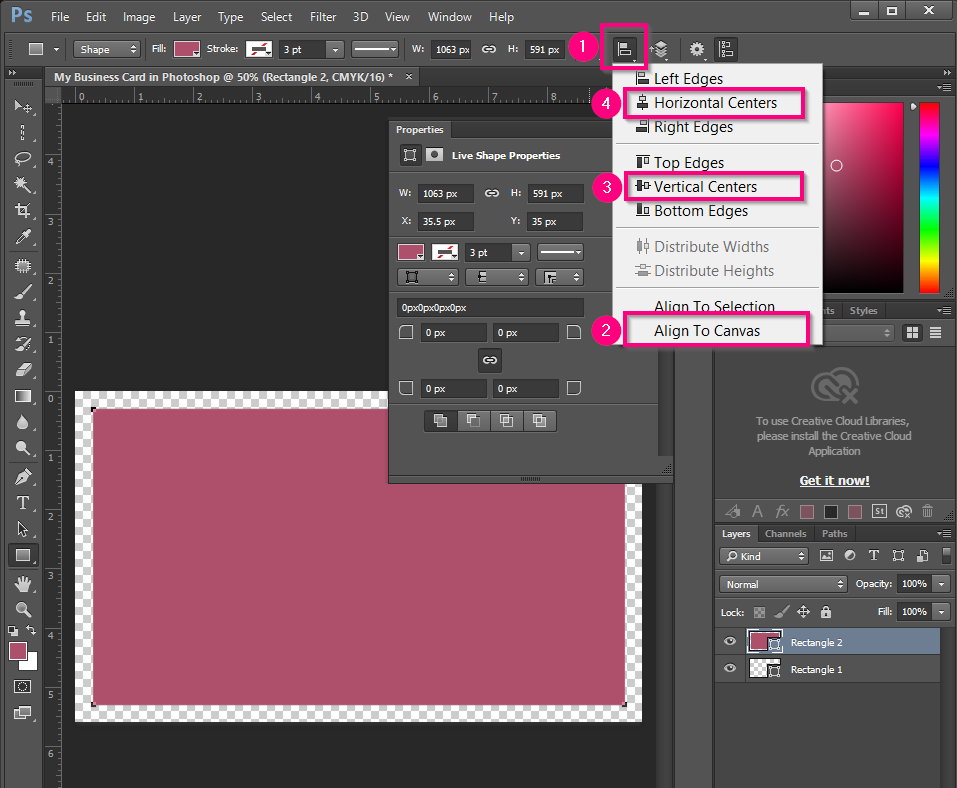
Once created, the rectangle needs to be center-aligned to your canvas. To do so, click the Align icon, then click Align to Canvas in the dropdown, and click Horizontal Centers, then Vertical Centers. Don’t forget to set the rectangle to be no color.
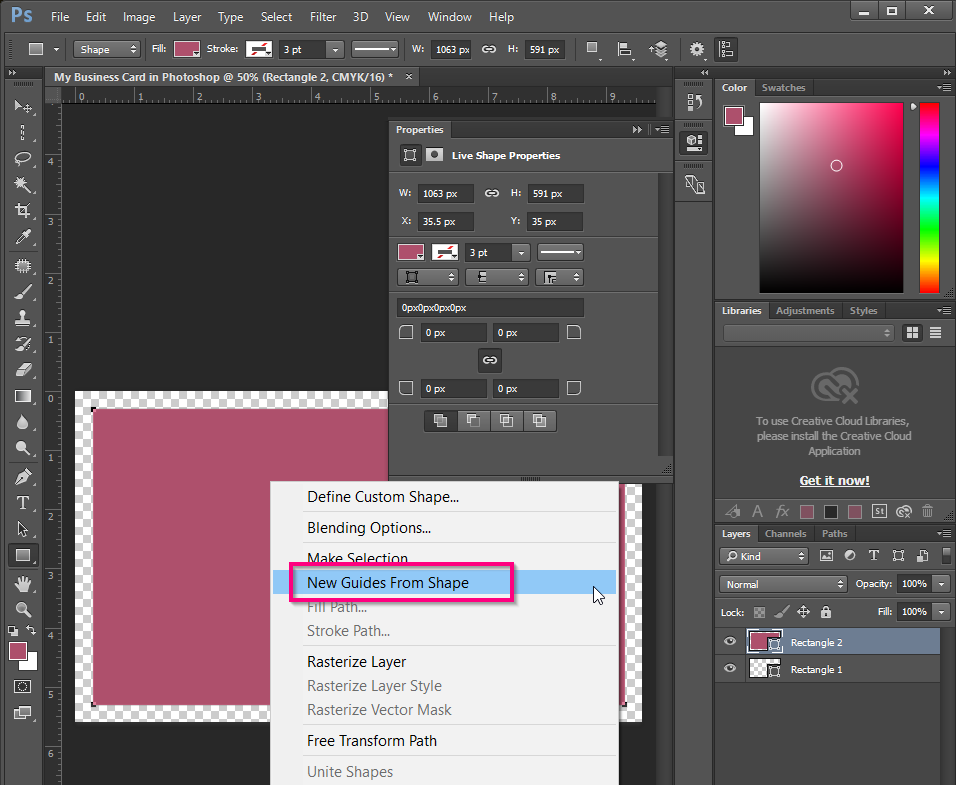
When aligned, the rectangle can be transformed into guides that mark the end of your printed product, by right-clicking the shape, and selecting the option New Guides from Shape.
You can repeat the above steps to create the safety margins for your file, by creating a rectangle with the final dimension of your printed product MINUS 0.3cm on each side. In our example, the rectangle should be 8.4x4.4cm, i.e. (9 - 0.6)cm width and (5 - 0.6)cm height. Important content should always be kept INSIDE this safe zone.
In the end, your canvas with bleed and margin should look like this:
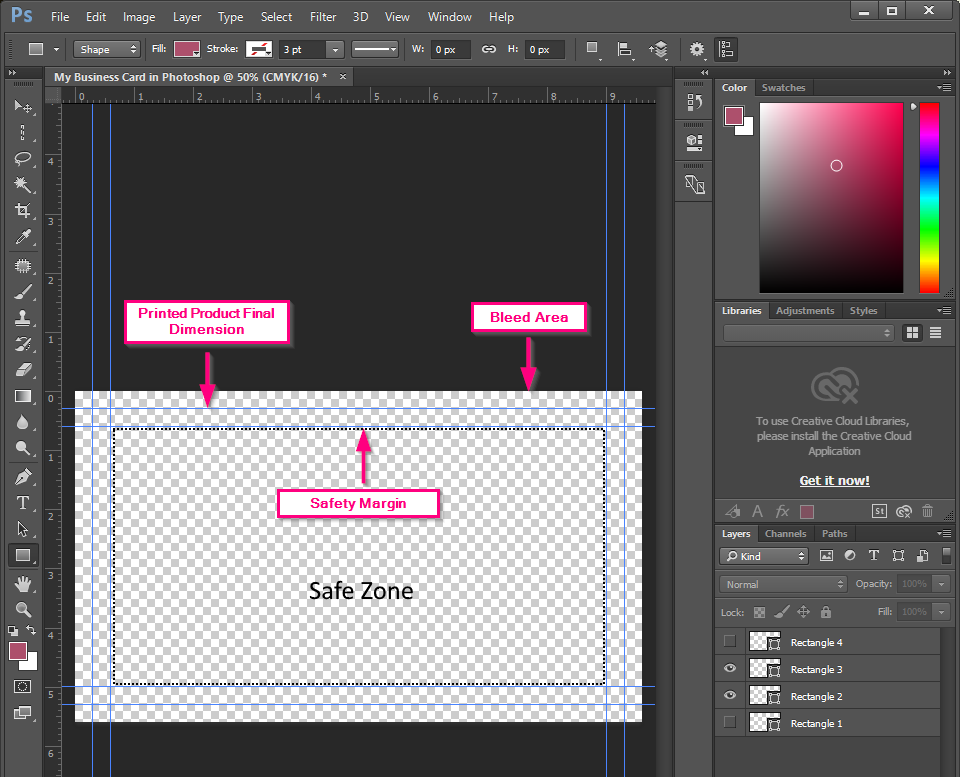
When you add a background (image, shape, or simply color), make sure to extend it to the end of the bleed area, i.e. the end of your canvas.


